Build your Homelab with Raspberry Pis

Building a homelab with salvaged Rpis.
What do you mean, salvaged Rpis?
It’s June 2024. With my partner / brother / co-founder at @antipodestudios, we land a pretty sick gig: building a full-blown app to manage a Nike Football event right in the heart of Paris.
The event featured several football workshops organized around different themes, plus a 1v1 tournament. To handle workshop and player management, we needed to build a web app that would let Nike staff manage the workshops through multiple iPads, and build separate giant-screen displays for scores, leaderboards, and all that good stuff.
We won’t get into the technical nitty-gritty — that’s not what this article is about. But basically, we went with raspberry pi 5s to drive each screen and display event data through a webapp.
If you want to learn more, check out @Nike Football x Bureau Pleiades x Antipodestudios. Or our instagram @antipodestudios.
After the event wrapped up (which was a technical win for us), I was left with several rpis 5 on my hands. Sitting next to some old rpis 4 and 3, they were just gathering dust.
Had to find a way to put them to work.
What do you even do with these nerd toys?
5 Raspberry pi 5s (8GB), 1 Raspberry 4 (2 GB), and 1 Raspberry pi 3 (not enough GB). A switch. Some microSD cards. That’s what I had lying around.
What to do with them?
And then, it hit me.

Throw them on the local network (my home network, duh), ssh in and host your little projects. That’s cool, but tedious. You need a more serious setup.
For client projects, I often set up Coolify on VPS instances to host their apps. It’s fast, efficient, connected to GitHub. But I wanted to host multiple projects without having to worry about which project goes on which machine. I needed a higher level of abstraction.
You get it — we’re here to go the extra mile and set up a full mini infrastructure. So we’re going with a kubernetes solution.
But here’s the catch: rpis aren’t really built for that. k8s is resource-hungry, just running it by itself. That would be a waste.
That’s when I stumbled on a project started by the folks at Rancher — ladies and gentlemen, k3s.
k3s is a lightweight version of kubernetes, designed to run on low-powered machines, e.g rpis. Perfect candidate for us!
Let’s get to it.

The hardware
Before diving in, I still asked my buddy Claude what he thought about the project. Fully validated! With one caveat: don’t rely on microSD cards. They tend to burn out over time. We want a stable cluster here.
So here’s the hardware setup we’ll roll with for the project:
- 4x raspberry pi v5 (8GB) -> workers
- 1x raspberry pi v4 (2GB) -> control plane
- 1x 2.5” SSD for the control plane
- 4x nvme SSDs for the workers (128 GB each)
- 8-port 2.5G switch
- Beefy 200W power supply to carry all this beautiful mess (and avoid having 5 separate power adapters for each rpi.)
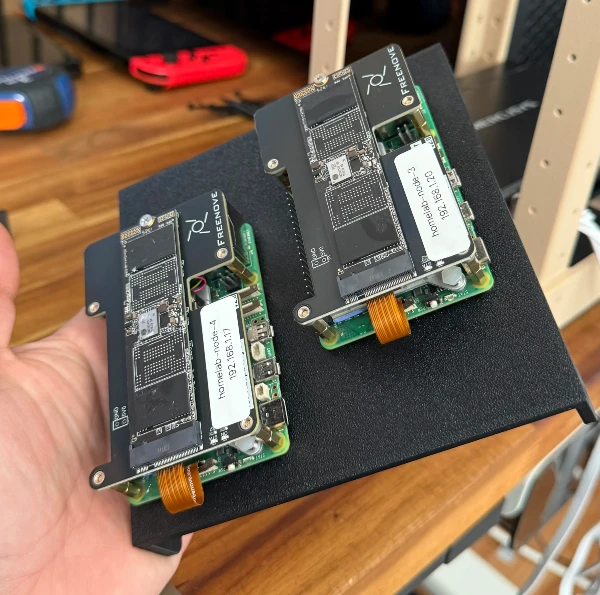
The raspberry pi v5s can accommodate an nvme SSD through an expansion board connected to the PCI port, here’s what it looks like:
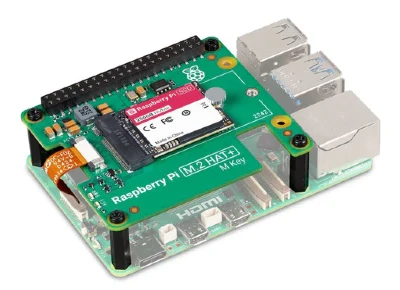
Yeah, alright… this was supposed to be a salvage project… no one’s judging here. We do things right.
We’ve got all the hardware we need to start setting up the software side. Let’s go.
The software
The software side breaks down into two parts:
- pick the right OS, install it on NVME and auto-boot from it
- set up k3s on each rpi.
The OS
Not a ton of options here. We pick from the official OS choices in Raspberry PI Imager. The only real candidate for us is Raspberry Pi lite OS (64-bit), no desktop environment.
The setup is pretty straightforward: flash microSD, create a user, add an ssh key (to access the pi directly — useful for setup and debugging), etc.
Flash it, power up the rpi, connect it to the network through the switch, and configure a static DHCP lease (important!) so it keeps the same local IP address (a prerequisite for proper communication under k3s).
To boot from the nvme, you need to copy everything over (dd is your best friend here) to the nvme, then select NVME boot with raspi-config.
Do this for all the raspberry pis. It’s time-consuming but simple. You could script this with Ansible or Terraform, but no need to overthink it here. It would be worth it though if the homelab needs rpi swaps down the road, to avoid having to redo everything by hand.
K3S
The fun part — and ironically the simplest. Follow the official docs. Starting with the control plane, obviously.
SSH into it.
I’ll skip the details (if you need help with this part, shoot me an email at hello@ademoverflow.com), but basically you install with this beautiful one-liner:
curl -sfL https://get.k3s.io | sh -Check that everything looks good, then run sudo kubectl get nodes to see if your control plane shows up.
Grab the k3s authentication token, then do the same on the other rpis:
curl -sfL https://get.k3s.io |
K3S_URL=https://<control-plane-ip>:6443
K3S_TOKEN=<node-token> sh -
If all goes well, we’re up and running! Our k3s cluster is live and ready. Well, almost.
Accessing from the local network
You could access the cluster from the control plane by ssh’ing into it. But that’s annoying and not clean.
So we’ll grab the kube config with the right certificates, and get it on our local machine (your computer, basically).
If I remember right, it’s at /etc/rancher/k3s/k3s.yaml. You might need to swap the loopback IP with the rpi’s actual IP for it to work.
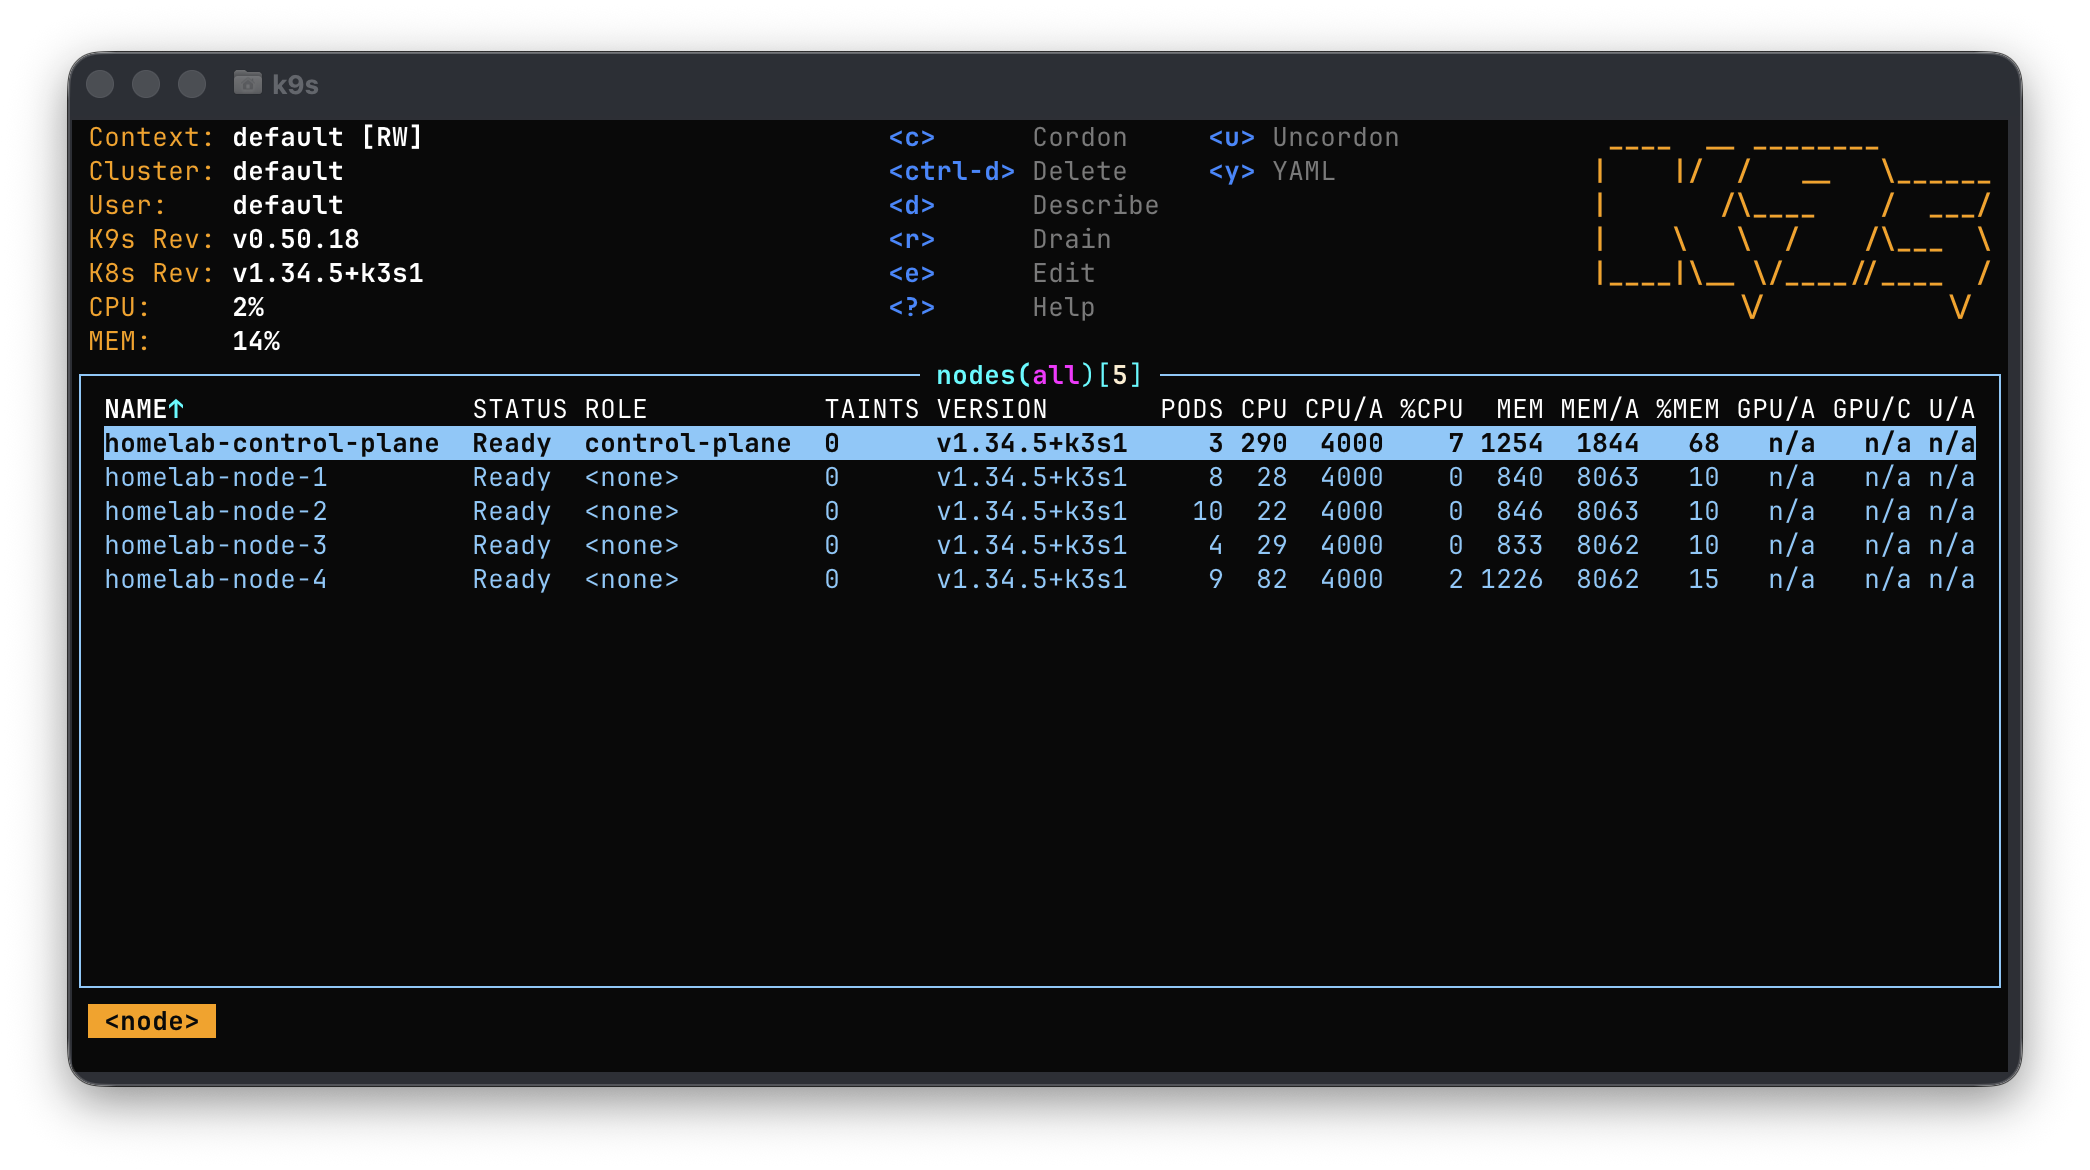
At this point, our k3s cluster is up and ready to take on workloads.

A little k9s screenshot, because why not!
Software OK, Hardware OK, now what?
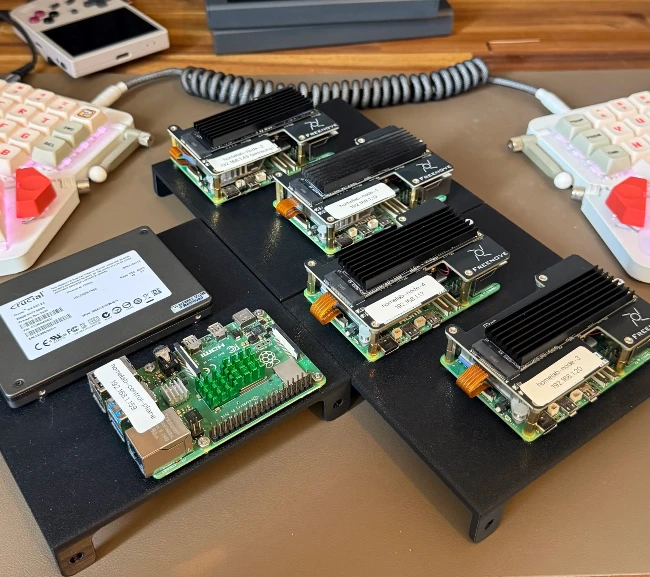
Alright, this is all great, but this whole setup isn’t going to stay on my desk. Just look at this mess:
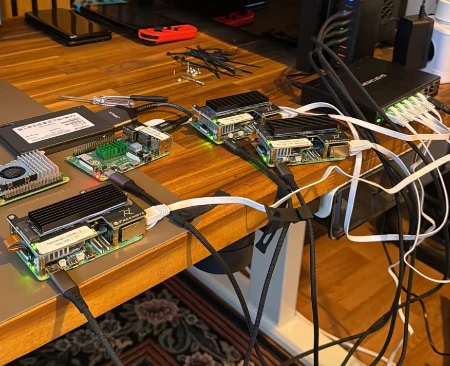
Time to design a mini vertical homelab-style server rack (who would’ve guessed!?), all 3D-printed.
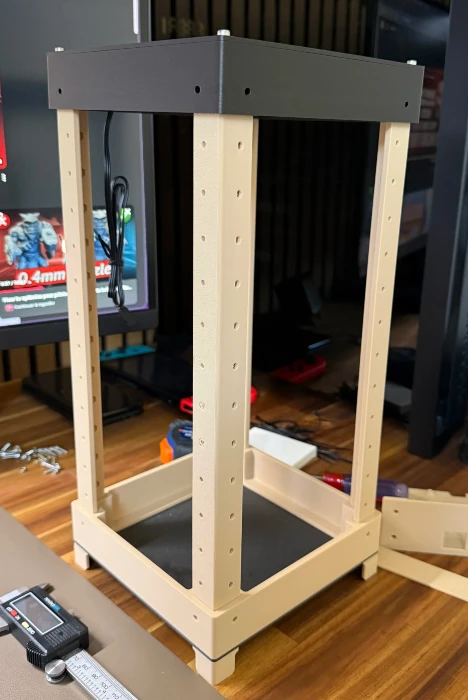
I scroll through makerworld, looking for a similar project, but nothing really catches my eye. I do find a decent “tower” base though and kick off the print.
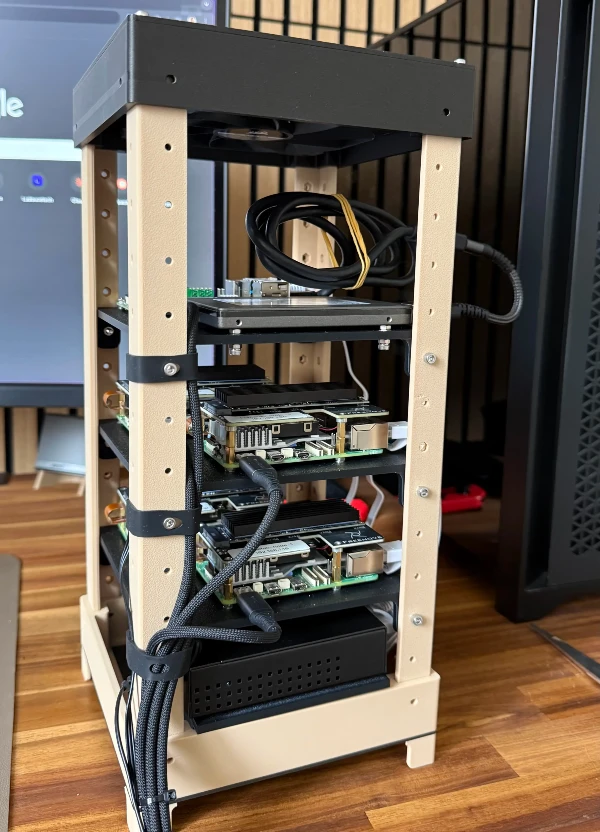
Here’s what it looks like:
Time to design the shelves now. We’ve got room, but let’s optimize a bit and fit 2 rpis per shelf.
Here’s the result:
In the end, we’ve got 3 shelves:
Assembly, cabling, yada yada…
And we get this beautiful homelab server:
Alright, everything’s good to go! Now, let’s talk about managing it.
But… that’ll be a separate article.
Until then, take care.
Adem.